Contents
System Configuration
System configuration establishes the reference data that Inventory Pro uses across all modules: item categories, carriers, payment terms, tax codes, cost centers, units of measure, packaging types, certifications, adjustment codes, asset classifications, and more.
All of these lists are managed in one place: System → Lists → System Lists
The System Lists page organizes lists into five tabs. Click any tile to open that list in a popup. Record counts on each card refresh automatically after you close the popup. Cards for lists you do not have permission to access are hidden.
New setup? Configure Categories, Units of Measure, and Payment Terms first - items and orders depend on these. See the Initial Setup Checklist for the recommended setup order.
| Tab | Lists |
|---|---|
| Items & Inventory | Categories, Units of Measure, Packages, Certifications / Inspections, Certification Units |
| Shipping & Purchasing | Carriers, Ship Via Methods, Payment Terms, Term Agreements |
| Financial & Accounting | Center Codes, Positive Adj. Codes, Negative Adj. Codes, Sales Taxes |
| Assets & Repairs | Asset Types, Depreciation Methods, Repair Process Points, Warranty Policies |
| System & General | Predefined Memos, Custom Logos, Folders List |
| Configuration | Tab | Tile |
|---|---|---|
| Categories | Items & Inventory | Categories |
| Units of Measure | Items & Inventory | Units of Measure |
| Packages | Items & Inventory | Packages |
| Certifications / Inspections | Items & Inventory | Certifications / Inspections |
| Certification Units | Items & Inventory | Certification Units |
| Carriers | Shipping & Purchasing | Carriers |
| Ship Via Methods | Shipping & Purchasing | Ship Via Methods |
| Payment Terms | Shipping & Purchasing | Payment Terms |
| Term Agreements | Shipping & Purchasing | Term Agreements |
| Center Codes | Financial & Accounting | Center Codes |
| Adjustment Codes | Financial & Accounting | Positive Adj. Codes / Negative Adj. Codes |
| Sales Taxes | Financial & Accounting | Sales Taxes |
| Asset Types | Assets & Repairs | Asset Types |
| Depreciation Methods | Assets & Repairs | Depreciation Methods |
| Repair Process Points | Assets & Repairs | Repair Process Points |
| Warranty Policies | Assets & Repairs | Warranty Policies |
| Predefined Memos | System & General | Predefined Memos |
| Custom Logos | System & General | Custom Logos |
| Folders List | System & General | Folders List |
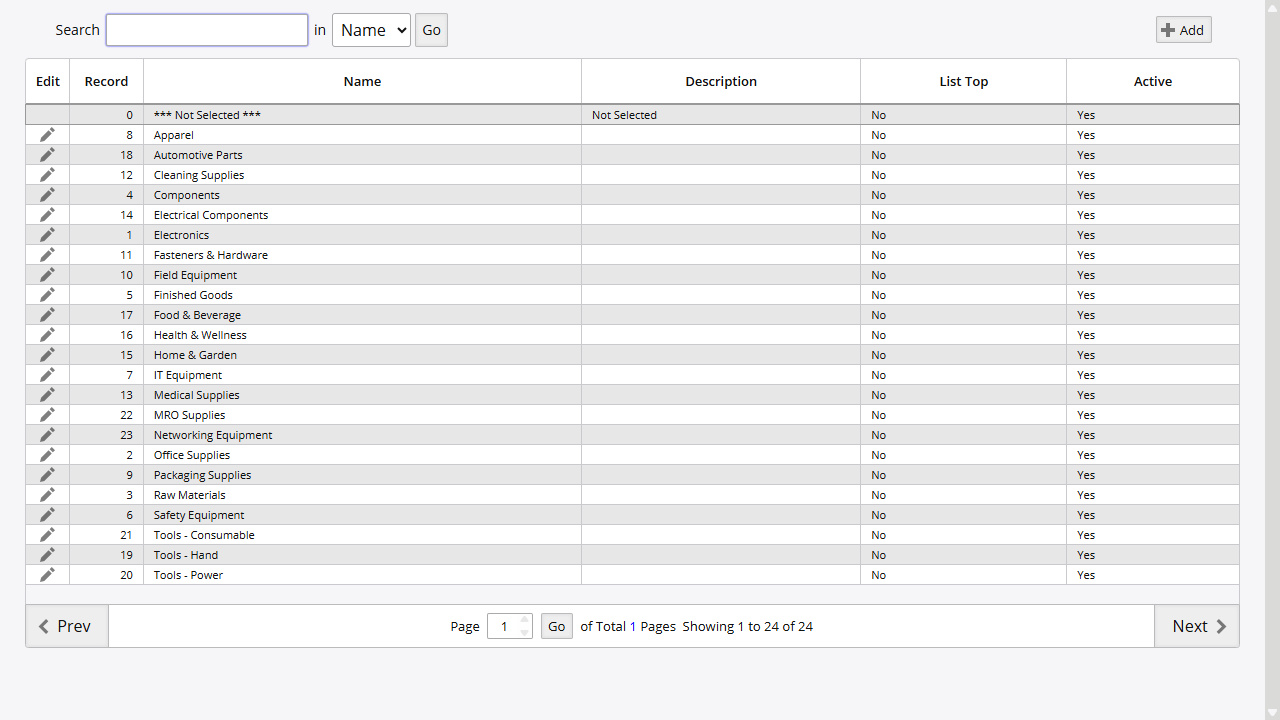
Categories
Categories group items for reporting and organization. They appear in item searches, transaction filters, and report groupings throughout the system.
Access: System → Lists → System Lists → Items & Inventory tab → Categories tile
| Field | Purpose |
|---|---|
| Name | Category name (e.g., Electronics, Raw Materials, Finished Goods) |
| Enabled | Enable/disable the category |
Carriers
Carriers define the shipping companies used for order fulfillment and inbound deliveries.
Access: System → Lists → System Lists → Shipping & Purchasing tab → Carriers tile
Security: Security ID 101 (View), Security ID 102 (Create/Modify)
Carrier Fields
| Field | Purpose |
|---|---|
| Short Name | Unique carrier code (displayed as “SCAC” in the list) |
| Full Name | Full carrier name |
| Primary Contact | Primary contact name |
| Contact 2 | Secondary contact |
| 7x24 Contact | 24-hour contact name |
| Address | Physical address for the carrier |
| Phone/Fax/Email | Communication methods (primary and secondary) |
| Discount % | Negotiated carrier discount percentage |
| Yard Charge | Yard charge amount |
| Authorize For Returns | Can handle return shipments |
| List Top | Display priority in carrier selection lists |
How to Add a Carrier
- Navigate to System → Lists → System Lists → Shipping & Purchasing → Carriers
- Click Add Carrier
- Enter the Short Name and Full Name
- Complete contact information and address
- Configure Discount % and Yard Charge if applicable
- Check Authorize For Returns if the carrier handles returns
- Click Save
Carrier Integration
Carriers link to:
- Shipping Orders: Select carrier for delivery
- Purchase Orders: Specify inbound carrier
- Supplier Records: Default carrier for supplier shipments
Payment Terms
Payment terms define invoice due dates and early payment discounts for customers and suppliers.
Access: System → Lists → System Lists → Shipping & Purchasing tab → Payment Terms tile
Security: Security ID 103 (View), Security ID 119 (Create/Modify)
Payment Terms Fields
| Field | Purpose |
|---|---|
| Description | Term name (e.g., Net30, Net60, Due on Receipt) |
| Net Due in Days | Number of days until payment due |
| Discount % | Early payment discount percentage (0–100) |
| Discount within Days | Days within which discount applies |
| Enabled | Enable/disable the term |
| List Top | Display priority ranking |
Standard Payment Terms Examples
| Term | Days | Discount | Discount Days | Description |
|---|---|---|---|---|
| Net30 | 30 | 0% | 0 | Payment due in 30 days |
| Net60 | 60 | 0% | 0 | Payment due in 60 days |
| 2/10 Net30 | 30 | 2% | 10 | 2% discount if paid within 10 days |
| Immediate | 1 | 0% | 0 | Payment due immediately |
| Due on Receipt | 0 | 0% | 0 | Payment due on receipt |
How to Add Payment Terms
- Navigate to System → Lists → System Lists → Shipping & Purchasing → Payment Terms
- Click Add
- Enter the Description
- Set Net Due in Days
- Configure discount if applicable:
- Enter Discount % percentage
- Set Discount within Days window
- Check Enabled to activate
- Click Save
Due Date Calculation
Due Date = Order Date + Net Due in Days
Discount Applied if payment received by: Order Date + Discount within Days
Payment Terms Integration
Payment terms link to:
- Supplier Records: Default terms for purchase orders
- Customer Records: Default terms for shipping orders
- Purchase Orders: Terms for specific orders
- Shipping Orders: Terms for customer invoices
Sales Taxes
Sales tax configuration establishes tax codes and jurisdictions for customer invoicing.
Access: System → Lists → System Lists → Financial & Accounting tab → Sales Taxes tile
Sales Tax Fields
| Field | Purpose |
|---|---|
| Description | Tax zone name (e.g., “Pennsylvania Sales Tax”) |
| State | State code for jurisdiction |
| City | City-level tax specification |
| Country | Country tax zone |
| Formula | Tax calculation formula |
| Enabled | Enable/disable the tax code |
Tax Configuration Points
| Setting | Location | Purpose |
|---|---|---|
| Tax Codes | System → Lists → System Lists → Financial & Accounting → Sales Taxes | Define tax codes by jurisdiction |
| Customer Tax ID | Customer → Tax ID field | Link customer to tax jurisdiction |
| Customer Tax Rate | Customer → Sales Tax field | Customer-specific tax override |
| Item Non-Tax | Item Master → Non-Tax checkbox | Mark items as tax-exempt |
How to Configure Sales Tax
- Navigate to System → Lists → System Lists → Financial & Accounting → Sales Taxes
- Click Add
- Enter Description for the tax zone
- Specify State, City, Country as applicable
- Enter a Formula for the tax calculation
- Check Enabled to activate
- Click Save
Customer Tax Exemptions
For tax-exempt customers:
- Navigate to the customer record
- Set Tax ID to 0 or the exempt tax code
- Alternatively, set Sales Tax field to 0
- Document exemption certificate in customer notes
Center Codes
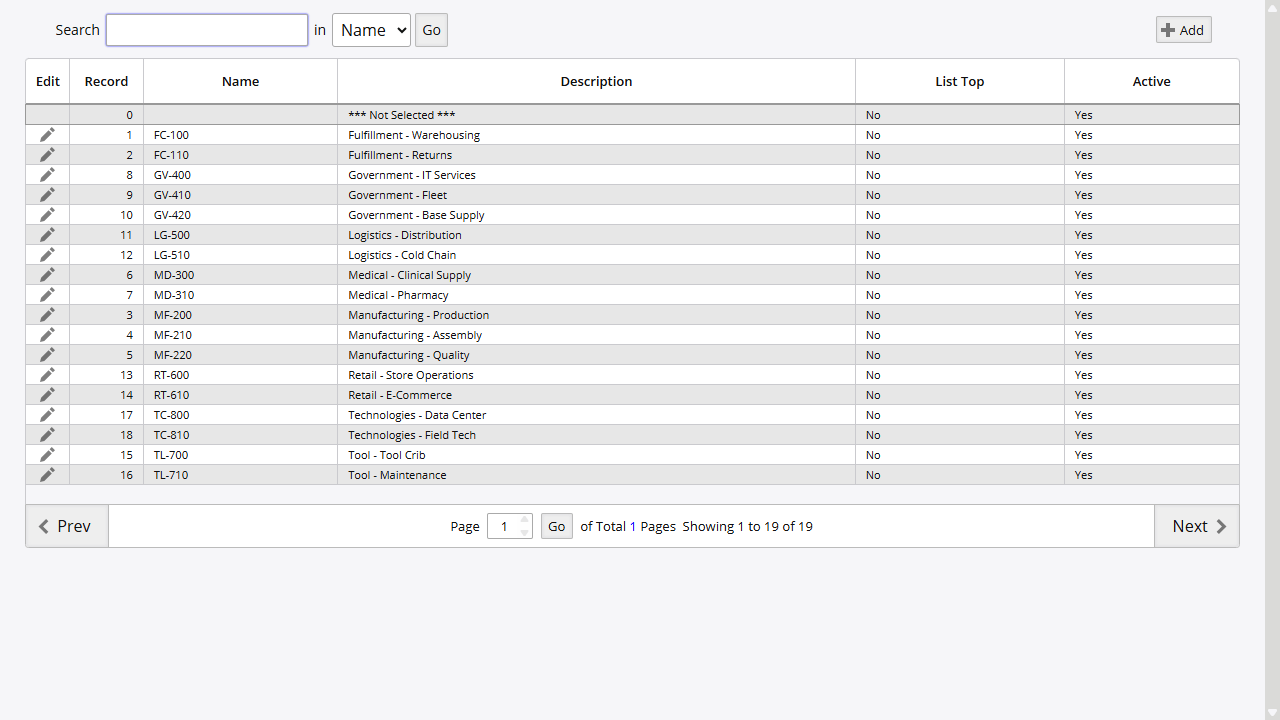
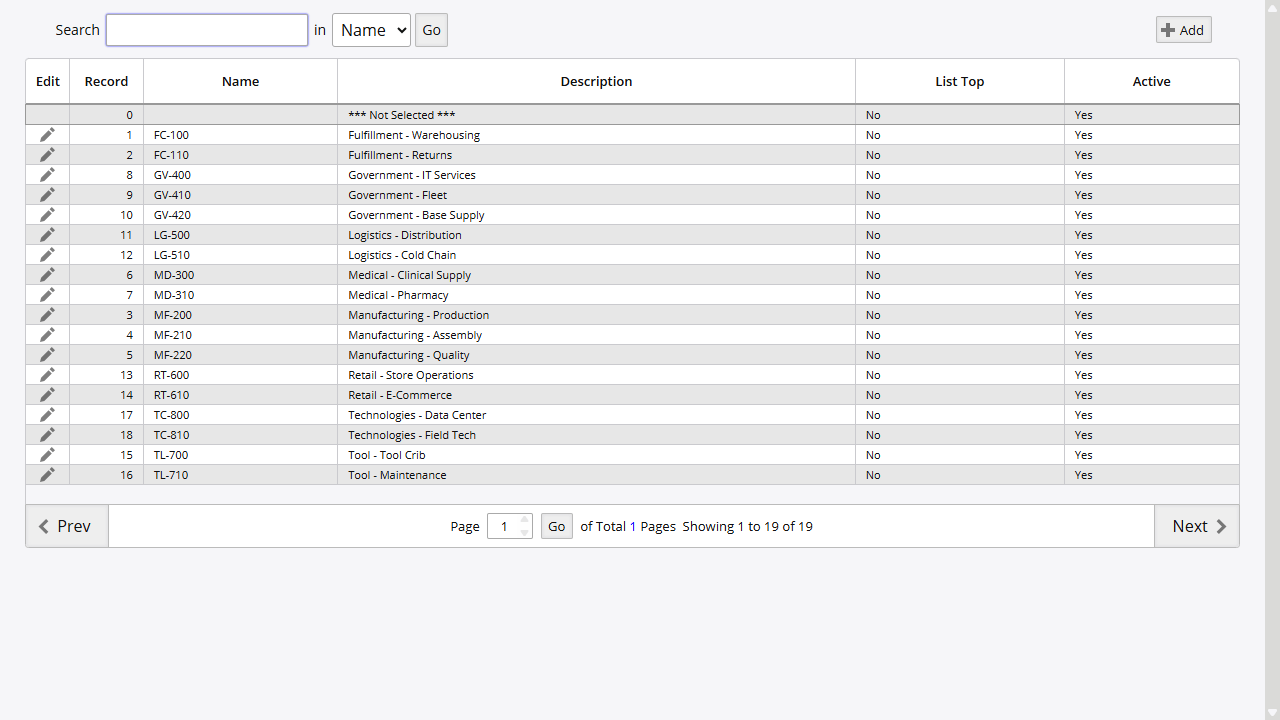
Center codes (cost centers) track inventory costs and transactions by department or business unit.
Access: System → Lists → System Lists → Financial & Accounting tab → Center Codes tile
Center Code Fields
| Field | Purpose |
|---|---|
| Name | Center code value (displayed as “Center Code” in the list) |
| Description | Department or business unit name (displayed as “Code Description” in the list) |
| Warehouse | Associated warehouse |
| Enabled | Enable/disable the center |
| List Top | Display priority ranking |
Center Code Examples
| Code | Description | Use Case |
|---|---|---|
| FC-100 | Facilities | Facilities department costs |
| MF-200 | Manufacturing | Production materials |
| MD-300 | Medical | Medical division |
How to Add a Center Code
- Navigate to System → Lists → System Lists → Financial & Accounting → Center Codes
- Click Add Center Code
- Enter the Name (this becomes the Center Code)
- Enter a Description
- Select the associated Warehouse if applicable
- Check Enabled to activate
- Click Save
Center Code Integration
Center codes link to:
- Item Master: Assign items to cost centers
- Transaction Reports: Filter and group by cost center
- Financial Reports: Cost allocation by department
Units of Measure
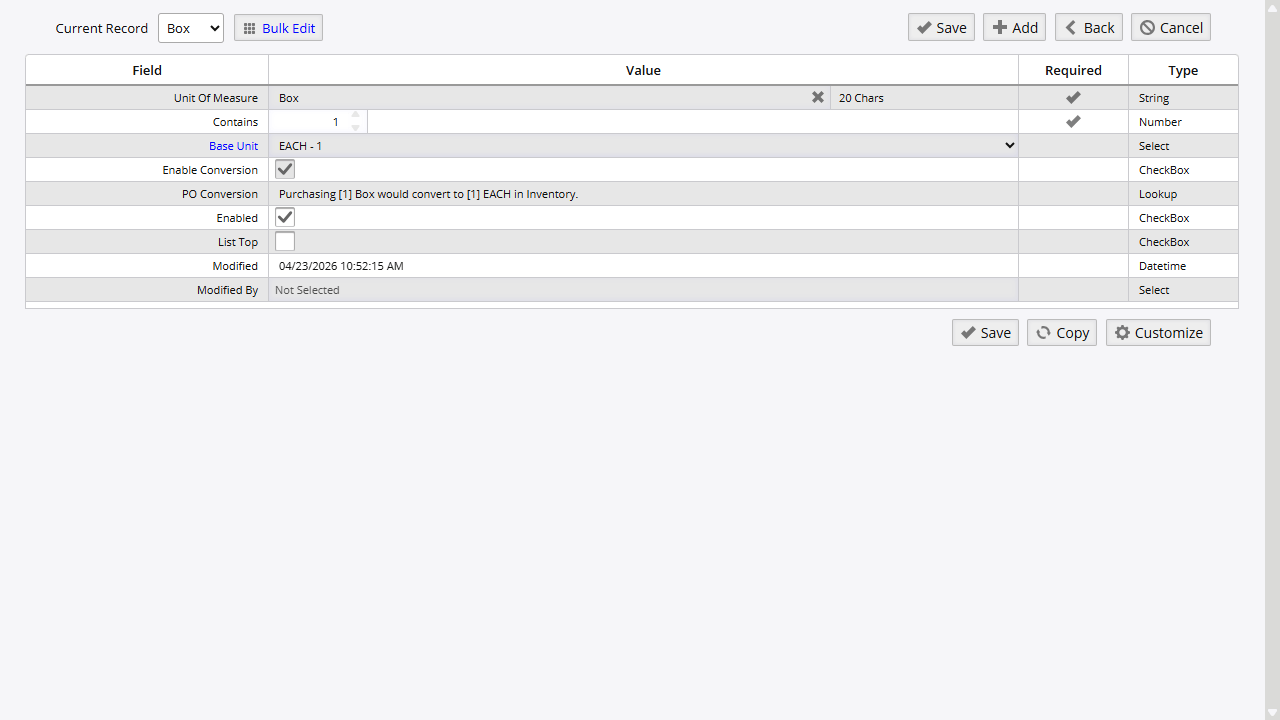
Units of measure (UOM) define how inventory is counted, stored, and ordered. Inventory Pro supports dual UOM for scenarios where you buy in one unit but sell in another.
Access: System → Lists → System Lists → Items & Inventory tab → Units of Measure tile
UOM Fields
| Field | Purpose |
|---|---|
| Unit Of Measure | Unit code (displayed as “Code” in the list; e.g., EACH, CASE-12, BOX) |
| Base Unit | Links to base unit for conversion (displayed as “Base Code” in the list) |
| Contains | Conversion factor to base unit |
| Enabled | Enable/disable the unit |
Standard UOM Examples
| UOM | Base Unit | Conversion Factor | Description |
|---|---|---|---|
| EACH | EACH | 1 | Single item |
| CASE-12 | EACH | 12 | Case of 12 each |
| CASE-24 | EACH | 24 | Case of 24 each |
| CASE-48 | EACH | 48 | Case of 48 each |
| BOX | EACH | varies | Box quantity |
| PALLET | CASE | varies | Pallet of cases |
Dual UOM Implementation
Inventory Pro supports tracking inventory in one unit while ordering in another:
- Inventory UOM: How items are stored and tracked (usually EACH)
- Ordering UOM: How items are purchased (may be CASE, BOX, etc.)
Example:
- Store soda as EACH (individual cans)
- Order soda as CASE-24 (cases of 24 cans)
- System converts: 1 CASE-24 = 24 EACH
How to Add a Unit of Measure
- Navigate to System → Lists → System Lists → Items & Inventory → Units of Measure
- Open the add form to create a new unit of measure
- Enter the Unit Of Measure code
- If this unit converts to a base unit:
- Select the Base Unit
- Enter Contains (conversion factor)
- Check Enabled to activate
- Click Save
Packages
Packages define container and packaging types used for shipping and storage. Apply them to items for packing calculations on orders.
Access: System → Lists → System Lists → Items & Inventory tab → Packages tile
| Field | Purpose |
|---|---|
| Name | Package type name (e.g., Box, Crate, Drum, Pallet) |
| Description | Optional description |
| Enabled | Enable/disable |
Certifications / Inspections
Certifications and inspections track periodic compliance requirements against items or assets. The system triggers reminders when a certification is due for renewal.
Access: System → Lists → System Lists → Items & Inventory tab → Certifications / Inspections tile
| Field | Purpose |
|---|---|
| Name | Certification or inspection name |
| Description | Requirement details |
| Enabled | Enable/disable |
Certification Units
Certification Units define the recurrence frequency options available when assigning certifications to items or assets (e.g., Days, Months, Years).
Access: System → Lists → System Lists → Items & Inventory tab → Certification Units tile
| Field | Purpose |
|---|---|
| Name | Frequency unit name (e.g., Days, Months, Years) |
| Enabled | Enable/disable |
Ship Via Methods
Shipping methods define how orders are delivered to customers.
Access: System → Lists → System Lists → Shipping & Purchasing tab → Ship Via Methods tile
Ship Via Method Fields
| Field | Purpose |
|---|---|
| Description | Method name (e.g., UPS Ground, FedEx, Truck) |
| Carrier Picks Up | Carrier picks up vs. deliver to carrier |
| Tracking Link Definition | URL template for package tracking |
| Account Number | Carrier account for billing |
| Enabled | Enable/disable the method |
Tracking Link Templates
Configure tracking URLs with the {tracking} placeholder:
- UPS:
https://www.ups.com/track?tracknum={tracking} - FedEx:
https://www.fedex.com/fedextrack/?trknbr={tracking} - USPS:
https://tools.usps.com/go/TrackConfirmAction?tLabels={tracking}
How to Add a Shipping Method
- Navigate to System → Lists → System Lists → Shipping & Purchasing → Ship Via Methods
- Click Add
- Enter the Description
- Check Carrier Picks Up as applicable
- Enter the Tracking Link Definition URL template
- Add Account Number if using carrier billing
- Check Enabled to activate
- Click Save
Term Agreements
Term Agreements record supplier-specific pricing contracts with negotiated rates, volume commitments, and expiration dates. They supplement standard payment terms with per-supplier pricing details.
Access: System → Lists → System Lists → Shipping & Purchasing tab → Term Agreements tile
For Term Agreement reports see Key Reports (Report IDs 276, 277, 278).
Adjustment Codes
Adjustment codes provide accountability for inventory quantity changes. There are two separate lists: one for inventory increases (Positive Adj. Codes) and one for decreases (Negative Adj. Codes).
Access: System → Lists → System Lists → Financial & Accounting tab
Positive Adj. Codes
Use positive adjustment codes when recording inventory increases outside of standard receiving.
Tile: Positive Adj. Codes
Positive Adj. Fields
| Field | Purpose |
|---|---|
| Description | Reason description |
| Warehouse | Restrict to a specific warehouse (optional) |
How to Add a Positive Adjustment Code
- Navigate to System → Lists → System Lists → Financial & Accounting → Positive Adj. Codes
- Click Add
- Enter the Description
- Optionally select a Warehouse to restrict use
- Click Save
Negative Adj. Codes
Use negative adjustment codes when recording inventory decreases outside of standard issuing.
Tile: Negative Adj. Codes
Negative Adj. Fields
| Field | Purpose |
|---|---|
| Description | Reason description |
| Warehouse | Restrict to a specific warehouse (optional) |
How to Add a Negative Adjustment Code
- Navigate to System → Lists → System Lists → Financial & Accounting → Negative Adj. Codes
- Click Add
- Enter the Description
- Optionally select a Warehouse to restrict use
- Click Save
Common Adjustment Code Categories
| Category | Examples | List |
|---|---|---|
| Found inventory | Found, Transfer In | Positive Adj. Codes |
| Cycle count gains | Count Adjustment Up | Positive Adj. Codes |
| Damaged / expired | Damaged, Expired, Lost | Negative Adj. Codes |
| Cycle count losses | Count Adjustment Down | Negative Adj. Codes |
| Transfers out | Transfer Out | Negative Adj. Codes |
Asset Types
Asset Types classify tracked assets for reporting and filtering (e.g., Equipment, Vehicles, IT Assets, Furniture, Software Licenses).
Access: System → Lists → System Lists → Assets & Repairs tab → Asset Types tile
| Field | Purpose |
|---|---|
| Name | Asset type name |
| Description | Optional description |
| Enabled | Enable/disable |
Depreciation Methods
Depreciation Methods define how asset value reduces over time. Assign a method to each asset to calculate current book value.
Access: System → Lists → System Lists → Assets & Repairs tab → Depreciation Methods tile
| Method | Description |
|---|---|
| Straight-Line | Equal reduction each period |
| Double Declining | Accelerated front-loaded reduction |
| MACRS | IRS-defined tax depreciation schedule |
Repair Process Points
Repair Process Points define the workflow stages that repair orders move through from intake to completion.
Access: System → Lists → System Lists → Assets & Repairs tab → Repair Process Points tile
| Field | Purpose |
|---|---|
| Name | Stage name (e.g., Pending, In Progress, QC Check, Complete) |
| Sort Order | Display sequence in repair order workflows |
| Enabled | Enable/disable |
Warranty Policies
Warranty Policies store coverage terms with start/end dates, supplier information, and claim procedures. Assign policies to assets or items.
Access: System → Lists → System Lists → Assets & Repairs tab → Warranty Policies tile
| Field | Purpose |
|---|---|
| Policy Name | Coverage name |
| Supplier | Warranty provider |
| Coverage Details | Claim procedures and scope |
| Enabled | Enable/disable |
Predefined Memos
Predefined Memos are reusable text blocks that can be inserted into orders, reports, and communications to reduce repetitive typing. Memo text appears as a selectable option on order entry forms, so staff can apply common notes - shipping instructions, hazard warnings, standard disclaimers - without retyping them.
Access: System → Lists → System Lists → System & General tab → Predefined Memos tile
| Field | Purpose |
|---|---|
| Name | Memo label shown in selection lists |
| Memo | Full text inserted when the memo is selected |
Custom Logos
Custom Logos manage company branding images used on printed reports, purchase orders, shipping documents, and invoices. Upload a logo here and it becomes available for selection when configuring report headers and document templates.
Access: System → Lists → System Lists → System & General tab → Custom Logos tile
| Field | Purpose |
|---|---|
| Name | Logo identifier shown in template configuration |
| Image | Uploaded image file |
Folders List
Folders List defines document folder categories for organizing file attachments. Folder names appear when attaching files to items, orders, and assets, so users can store manuals, warranties, photos, and other documents in labeled categories.
Access: System → Lists → System Lists → System & General tab → Folders List tile
| Field | Purpose |
|---|---|
| Name | Folder category name shown when attaching files |
| Enabled | Enable/disable the folder category |
Initial Setup Checklist
When first configuring Inventory Pro, complete these steps in order:
- Categories: Create item groupings for reporting
- Units of Measure: Configure EACH plus any case/box units
- Packages: Add container types used in shipping
- Payment Terms: Define Net30, Net60, and any custom terms
- Carriers: Add primary shipping carriers
- Ship Via Methods: Configure shipping method options
- Center Codes: Create department/cost center codes
- Sales Taxes: Set up tax jurisdictions
- Adjustment Codes: Review and customize positive and negative adjustment codes
- Asset Types: Configure asset classifications if using asset tracking
- Depreciation Methods: Set up depreciation schedules if applicable
- Warehouses: Configure warehouse locations
Key Reports
| Report | Report ID | Purpose |
|---|---|---|
| Carriers List | 202 | List all configured carriers |
| Center Codes | 271 | List all cost centers |
| Certifications / Inspections | 132 | All certifications and inspection records |
| Term Agreements | 276 | All supplier payment agreements |
| Current Term Agreements | 277 | Active supplier payment agreements |
| Expired Term Agreements | 278 | Expired supplier payment agreements |
| Folders List | 129 | Document folder categories |
Related Topics
- Admin Options - System behavior settings
- User Management - User accounts and permissions
- Security - Permission configuration
- Warehouses - Warehouse setup
On this page